Showing posts with label AAR. Show all posts

Saturday, 27 August 2016

Battle of Phillippi 3/6/61

I've foolishly wanted to play out Historical scenarios from the American Civil War from the beginning to end since I started collecting my armies. So this is the first of the series and arguably the first land battle of the civil war.
The Historical Battle of Phillippi was a instant rout with the Union forces surprising  unorganised Confederates in an early morning pincer move. To create some interest for myself I tasked the Confederates with holding the Town with two regiments against Col. Dumonts Brigade for 12 turns until Col. Kelly's Union Brigade turns up and sweeps all before them.
Dumont's column consists of the 14th Ohio, 6th and 7th Indiana Regiments plus two 6pndrs from the Cleveland Lt Artillery.


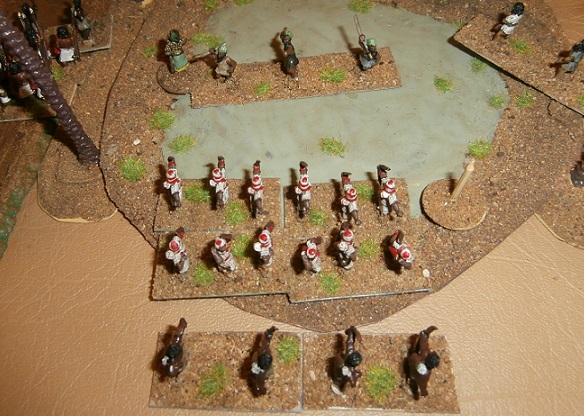
The alarm is raised and Col. Porterfield deploys a regiment each side of the bridge. 

Col. Dumont arrives with the 6th, 7th Indiana Regiments and the two 6pnr guns.  

The Guns deploy on the hill ready to support the advancing infantry. 

The 6th Indiana use the south woods as cover to out flank the Confederates.

 The 14th Ohio arrive on the Union left.

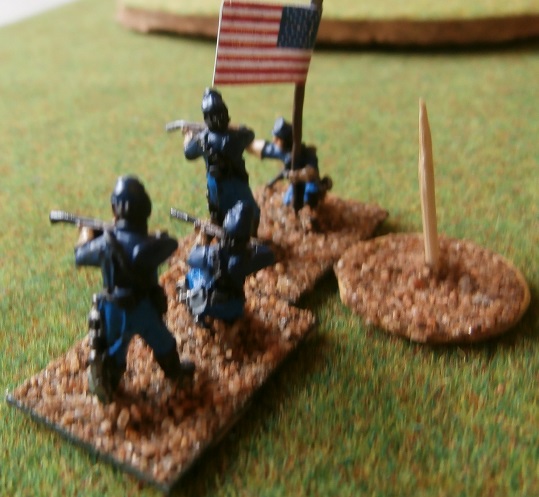
 The federals move into musket range.

The 7th Indiana take some hits. The drummer means they have disorder.


 The 1st Confederate Regiment has markers showing it is Disordered and Shaken.
Wooden houses only give a minimum amount of cover.

By turn 5 the 1st have had enough and run.
Fortunately Col. Porterfield was on hand to rally the boys!
  
 The 1st, now rallied, occupy some buildings on the south side of the river.

The 2nd Regiment now start taking the heat. They are now disordered. 

The Federals charge just falls short.

 The 6th Indiana successfully charge in.

  Col. Porterfield successfully manages to rally the second regiment.

 But they are charged in the rear by the 6th Indiana and...

 routs.

The 6th then charges the last defended house but are broken.

On turn 11 the 7th Indiana attempt to cross the bridge but are disordered by Confederate musketry.
These troops then clog up the bridge allowing the Rebels to hold until the end of turn 12.
Confederate Victory!

I trialled the Black Powder Glory Hallelujah rules
and they gave an enjoyable game.

The next battle Big Bethel.

Saturday, 18 June 2016

Advance Guard Scenario: Egyptian V Canaanite

Eventually managed to test drive the Impetus rules using the Neil Thomas scenario No. 16 "Advance Guard" I added my usual random terrain, increased the size of the armies and tweaked the circumstances of the scenario.

The situation.

The Egyptians and Canaanites are both attempting to secure an oasis in northern Sinai.
Each armies advance guard is approaching the oasis through poor visibility.
Neither army will be able to leave the road until one side has reached the oasis.
At that point the sand storm lifts and its business as usual.
The Canaanite plan (on the left) was to secure the Oasis with skirmishers backed by
a band of light foot and use these to pick off the Egyptian heavier foot.
The Egyptian plan ( on the right) was to screen off the bottle neck between the soft sand and Oasis
with a small force, hook to their left with the Chariots supported by archers and
smash through the Canaanite centre with their spearmen.

The Canaanite host reaches the Oasis. The Chariots have all been discorded by quick movement.
Unfortunately they are being lead from the front by their General! 

The Egyptians have also fallen into disorder attempting to race to the Oasis.
They also have accidently placed their General (Yellow chariots) at the front.

The sand storm has cleared and both sides attempt to shake out into a battle formation!

The Canaanite General (Purple) is in the lead and disordered.
But manages to shoot and hit the Egyptian General. First blood!
Chariots, in these rules do not manoeuvre very well in close confines.  

The Egyptian General (Yellow) has managed to get clear of the traffic snarl.
However A) he doesn't want to be on the flank and out of command and B) has already taken a hit.

More chaos as both sides continue to spread out and arrows fly both ways. 

Accurate close range shooting by the Amun (Blue) Chariots and some Nubians Archers
wound the Canaanite General whose body guard rush from the field. A major blow!

Disorder makers everywhere as both sides attempt to reorganise.
The Canaanites are missing a General which is already hurting. 

The Canaanite red chariots charge and force the Egyptian General to retreat.
He now has two casualties. 

The Canaanites capture the Oasis.

With an exchange of archery the Yellow Canaanite Chariots  decide to follow their General home.


Suddenly the balance has tipped the Egyptian way on the open flank.

The Nubian Archers supported by the Egyptian Re Archers challenge for the Oasis.

The Egyptian Amun Archers shoot at and routs the Canaanite Green band. 

 The Re Spear finally gets to grips with the Yellow Band who just melt away on contact.

 The Re Archers cause the Green Skirmishers to rout!
The Canaanite army is falling apart!

 More grief as the  Amun Spear charge and disperse the Canaanite blue band!
Who at least manage to cause some casualties.

Suddenly the Canaanites are out numbered.


Desperate the Canaanites keep throwing units against Nubians and Re Archers.
Who just keep winning.
 There was one final Chariot clash on the flank between the undefeated Canaanite Red Chariots
and the successful Amun Chariots. 

View from the Canaanites  side as their army breaks.
Victory to the Egyptians who I think have an advantage in this sort of close in fighting.

Man of the match to the unnamed Nubian Skirmishers.
They ended up with two routs and an assist. Not bad for skirmishers!

Wrap up

Basically the Canaanites were unlucky. Their Chariots lost an even fight and
they couldn't hit a barn door with their javelins! 
I enjoyed the rules though there is a bit of a learning curve. Some of the things that seem a bit off
in the first read through make sense when your playing.
 I even started converting my figures over to the new basing during the game.
Its so much easier to pick up a unit on one base!


Sunday, 24 April 2016

Static Defence Scenario: ACW

A Neil Thomas Scenario with two objectives. A camp in the east
and a dominate hill in the North/West.
Dicing made the Union the defenders with 4 Green Infantry Regiments,
a Green Cavalry Regiment and a 6 gun 12pndr Napoleon Battery.
 2 units must remain near each objective and the Confederates only need to capture one to win.

Deciding the Camp is the most obvious target the Federals defend it
with two Infantry and the Battery. 

 The 2nd New York Volunteers ready to defend the camp.

 The Hill is further north and garrisoned by 71st New York Regiment and the 10th Illinois Cavalry. The 2nd New Hampshire is positioned so they can quickly support the Camp.

 The Confederates dice for their force and receive 4 Green Regiments,
an experienced Zouave Regiment and a battery of  4 12 pndrs.
All the confederates come on the west side heading for the far Hill objective!

 The Louisiana Tigers. They were the only experienced unit for both sides.

The Union begins to redeploy to defend the Hill!

The 10th Illinios dismount and head towards the west wood.

 The Battery unlimbers ready to fire in support.


 The 6th North Carolina manage a double move and successfully charge the Federal guns!

The 5th Massachusetts cross the fence to confront the North Carolina's


 The 7th Georgia form line and advance on the west wood. 

 The terrible odds facing the 71st New York.

 The 2nd New Hampshire defends the central wood from the 2nd Alabama.

 The Rebel Battery begins to bombard the 71st NY.  

 The fight for West Wood gets close and intense.

Out numbered the 71st NY bravely stands its ground.

Eventually it takes too many stun hits retreats back to the Hill!  

The dismounted Cavalry starts to stack up hits on the Georgians!   

General Porter rallies the 71st NY.

 The Cavalry wins!

The Georgians rout from the field.

The Federals manage to get the upper hand in the Central Wood as well.

 The 6th Nth Carolinas have seen off the 5th Mass  and are now confronted by the 2nd NY.

Battered the 4th Alabama retreat from the Central Wood.

The Illinois are pushed out of the West Woods.

 The Tigers fight for the Central Wood.

 The 6th fight off another Union Regiment

The Union Counter attack.


 The 71st are again forced back to the Hill.


The 2nd New Hampshire rout from the Central Wood!

 The artillery deliver constant fire.

And the 71st eventually break!

General Evans and the Tigers march unopposed to the Hill.
Confederate Victory!

The rules used were the  Shako to Coal-Scuttle by Nordic Weasel Games.
I've changed some rules to allow for Troop grades and ACW regiments habit of running then rallying.
Plus Brigade Commanders ratings. I have found them fun to use so far.