Showing posts with label Napoleonic. Show all posts

Sunday, 29 March 2015

"Melee" French v Austrians Neil Thomas Scenario No.8

Neil Thomas's book "One Hour Wargames" Comes with 30 excellent scenarios. I've been itching to try them out but made some adjustments for the type of game I wanted. First I added some simple random terrain rules. Then wanted  to avoid having to mark or bookkeep up to 15 pts per unit so changed the combat rules to opposing dice roles and full base removal. (Works out to about the same as the original rules.)
 
The Set up
In the centre is a hill that's the object for both sides, looking north.
 The southern wood was a random selection.
The Austrians have 4 Line Battalions, a Dragoon Regiment and a 6pndr Gun.
They set up with two battalions defending the hill.
After dicing for force composition the French ended up with 3 Line Battalions,
two skirmishers and a Battery of 8 pndrs.
 
The French bring on the artillery and both skirmishers.
 
The French Voltigeurs advance using the woods for cover. 
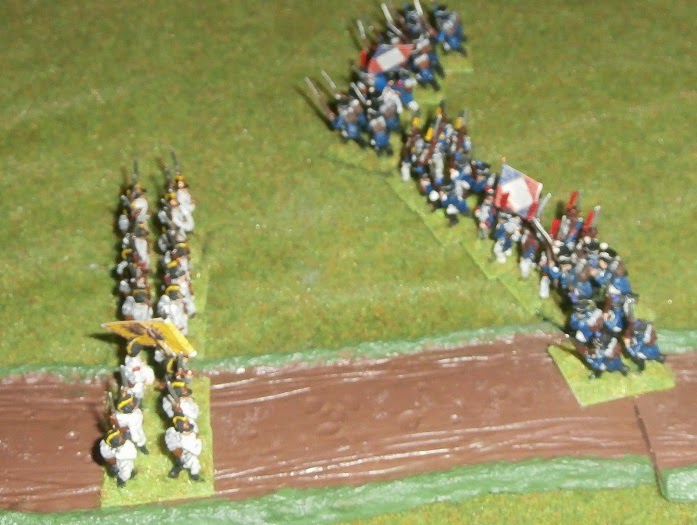
Fuzzy Austrian Dragoons move by road!
The French line regiment arrives.
 Hemmed in by the wood they are forced into the bottom corner of the field.

The Voltigeurs and the Austrian 1st Line begin a  shooting duel
 that will last the majority of the game and end with them both depleted.
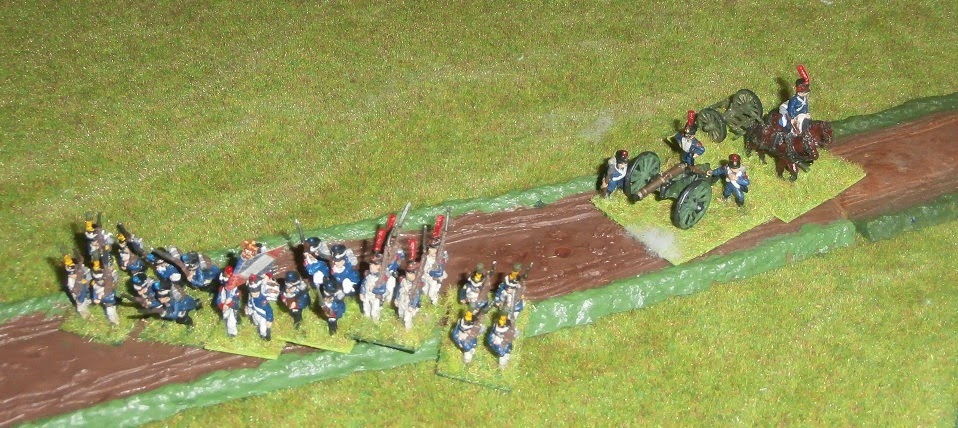
The Dragoons gallop straight down the road directly at the guns.
Taking fire from everyone they don't care!

And end up one inch short of reaching the French guns.
Their supporting infantry do their best to take some of the pressure off!
The last of the Austrian Brigade arrives.
The musket dual for the hill is intensive with the woods giving
the French an advantage.  Both Austrian battalions have taken losses with
the first near to dispersing.
The dragoons take a loss from terrible close range fire.
They charge! Loose and then fail a moral check!
The first unit to rout.
The Austrians have decided to disperse the skirmishers with the bayonet.

The French now have an overlap and a fresh Line battalion.

Another masks the guns as it heads for the hill.
At this point it looks pretty good for the French.
They have only had minimal losses and the Austrians have lost their cavalry
 and have another unit one casualty from running. 
The Austrians in the east manage to cause a two base loss on the fresh French Battalion.

They then charge the lights in the woods.


More bad news for Austria when a counter battery exchange results in the loss of their limber!
The Voltigeurs rout!

The 2nd Line Routs!

The Chasseurs Rout!
Suddenly the Austrians have the advantage of 5 to 3!


The French artillery is on target again and knocks out the Austrian 6pndr.
4 to 3
 
The Austrian 3rd Battalion, alone on the left flank finally succumbs to musket fire and breaks.
3 units each.
 

Next turn the Austrians rout the nearest French Battalion.

This leaves the French with just two units. a beat up Line Battalion and the amazing 8 pndr.

They concede and leave the Austrians with possession of the hill.
 
What an enjoyable game. Can't remember one where the fortunes swung so much so many times.
First it looked like the Austrians had the advantage with the army rolls then the extra wood forced the French into a corner with their entry point. This confidence in an Austrian victory may have triggered that impetuous, full length of the table, cavalry charge! The one that nearly cost the battle.
The scenario seemed simple but brought a great game. I'm more than happy with my rule changes. Though I will probably add a rally back for Cav and an evade or similar for lights. And those musket ranges are about twice what they should be. :)


Wednesday, 6 November 2013

Holding Action

A Solo Rules Test

 I decided to give my solo rules a run with both sides on auto using the
Holding Action(1) Scenario from Charles Grant's Scenarios for Wargamers book.
The rules are simple and all about the random allocation of units between
5 commands Left Flank, Right Flank, Centre, Reserve and Off Table Reinforcements.
The difference in strength for the Flanks or Centre decides where attacks are committed and
the movement of troops from the Reserve in response to changing situations or
the arrival of Off Table Reinforcements can change these dynamics.
I've found the tactical behaviour of this system is more
likely to appear directed than it is to seem questionable.
The link to an outline of the solo rules Here

The Scenario

The French are attempting to hold a strong position till dusk. The Austrians are attacking in the direction of the white arrow. If they can exit one unit off the road in 15 turns they win.
If the French still hold the gap at game end they win. 

OOB's and Commands

The Austrians have 2 Dragoon Regiments, 2 Cheveauxleger Regiments, a  Battalion of Grenz light infantry, 8 Line Battalions and a 6pndr Battery.
The French have a Chasseur Regiment, a Legere (light) Battalion, 5 Line Battalions and a 8pndr Battery.

The random allocation of French forces gave two Line battalions 
holding the woods and hills on their right flank.
Two line Battalions in the centre command holding the gap.
 
The Left flank consisted of one lone Line Battalion. The 1st/2nd Battalion.
The army reserve ended up with Chasseur Regiment, the artillery Battery and the Legere Battalion which I mistakedly deployed in skirmish.
Off table Reinforcements consisted of only a group of Voltigeur skirmishers. 
 
The Austrian Left Flank received only one Line battalion.
  
The Austrians ended up with a strong centre behind the village of 4 Line Battalions, the 6pndr Battery, the Grenz deployed as skirmishers and some second rank skirmishers.
They also ended up with an all cavalry right wing consisting of
the 1st Dragoons and the 2nd Cheveauxleger.
The Austrian Reserve begins one turn off table and was made up of just one Line Battalion.
Their Off Table Reinforcements are the 2nd Dragoons, the1st Cheveauxleger and 2 Line Battalions.
With 6 1/2 Austrian units to 2 French ones the Austrian Centre must attack.
(any advantage greater than 30% requires that command to attack)
But they are finding the town and neighbouring woods a bit congesting.
With a 100% advantage on their right the Austrians must also attack here.
The Austrian Cavalry quickly close the distance.
In the centre the French unmask and umlimber the guns.

The 1st/2nd Battalion sole unit on the French left forms square
at the approach of the Austrian Cavalry.
The Austrians begin their obligatory two rounds of preparatory fire.
The French begin counter battery fire and manage a lucky hit. 
The 1st/2 Battalion are charged and repel the 2nd Cheveauxlegers.
The French battery continues to fire at the Austrian guns-
And again the French hit! The Austrians fire at the Line battalion on the hill-
 And manage some disruptive hits on the battalion behind with over shoots.
The Austrian right is still obligated to attack. So the 1st Dragoons go charging up the hill.
But they take far too many casualties and rout from the field.
But then coincidently Off table Reinforcements arrive that same command phase
and bring the 2nd Dragoons to Austrian right Flank!
Another Line battalion arrives from Reinforcements for the centre.
Requests from the right Flank for the Reserve Battalion of infantry falls on deaf ears!
The French 8pndrs continue to pound the Austrian guns.
And by amazing luck manage to destroy them.
The Austrian skirmishers have already managed to reach the gap forcing
the French to charge and clear them away.

A general engagement begins in the centre between Austrian skirmishers the French Line battalions.

Meanwhile the Austrian Right Flank again advances.
The 1st Cheveauxleger regiment arrives as a reinforcement.
(Essex figures and my first Austrian Cavalry regiment 20yr old this year.)
The pressure is too much for the Austrian part time skirmishers and they drift away.

The Austrians attempt to charge the French on the hill just north of the gap but are halted but a last minute volley. The drummers indicate both battalions are staggered and the French battalion has taken casualties.

Another Austrian battalion arrives as a reinforcement.

Heated exchanges of volleys in the gap has resulted in mounting casualties on both sides.

The 2nd Dragoons charge the 1st/2 Line who are still in square and refusing to budge.

The 2nd Dragoons also rout!
 
Charles still refuses to hand over his one battalion of reserves.

An Austrian Battalion routs from the fire fight in the gap.

The position during the ninth turn.
The 2nd/3 Battalion has finally repulsed the Austrians off their hill in the centre. 
The voltigeurs reinforcements arrive.

The Austrians begin moving more troops up in the centre.
And the French Battalion holding the gap breaks.

The Austrians move through with cavalry support. As they now out flank the French holding the hill. Mean while the a Austrian line battalion reinforces their right wing.
They are able to move right up and fire into the battery at effective range.
The infantry are routed by grape shot but the 1st Cheveauxleger Regiment charges in.

The French are charged from two directions on the hill.

The 1st Cheveauxleger Regiment over runs the guns and rallies back. Horses blown.

The Austrians have managed finally to take the hill in the centre.

The 1st Cheveauxleger Regiment again charges forward and disperses some infantry skirmishers.
The 1st/2 Battalion has continued to hold even when faced by combined operations.


But it wasn't enough to give the Austrians a victory.
The French have held till dusk but lost control of the gap. A draw!
It was a very eventful game and the French had outrageous luck at times!
I used the Shako for the tactical rules and found the solo system gave me a very enjoyable game.