Wednesday 20 May 2015

Syrian Bronze Age Archers

Just started building a Mitanni  Bronze age army.
The Mitanni controlled Syria, parts of Palestine, Anatolia and
 even subjected the fearsome  Assyrians.


The chariot was the dominate arm in their armies which must have been very cosmopolitan.
To reflect this I'm going to vary the dress style of the regiments.


Friday 15 May 2015

The "Take the high ground" scenario. Egyptians V Canaanites

Using the Neil Thomas Scenario 4 and his Ancient Rules.  A Battle Group of Egyptians consisting of 3 Chariot Regiments supported by an Archer, Spear and a Khepesh regiment have surprised a Canaanite army looting an Egyptian Delta village.

The Terrain

In the centre is a large hill which serves as the victory objective.
Random terrain roles produced a village (Top left) and two impassable areas (about a 1 to 1000 chance of two!) Which is good because it gave me a chance to place my new soft sandhill
(RHS in the middle of the Egyptian deployment area) and
my newly made soft sand area (at bottom left).

The Canaanites deploy their Black and Red spear regiments to defend the hill.
Ignoring the option to lead with their Two Chariot regiments and  use them to skirmish
and delay the Egyptians while the rest of the army gets into position.
It was considered too risky.
 
The sandhill forces the Egyptians to split their deployments.
They place the Re Spear and Re Archers on the left flank.

And the three Chariot regiments with the Khepesh Regiment on the right.

After the Egyptians advance the balance of the Canaanite force forms up.
The Red and Green Chariot Regiments.

And the Green Spear and the Green Javelins.
The Green Javelins are a freshly painted unit. Good luck boys!

The Egyptians advance and the Ptah (green) Chariots manage
a few bow shots at the Red Spear on the hill.
The Canaanite foot move through the village.

As the Chariots rush to the rescue!

The Egyptian Chariots flank and shoot at the Red Spear on the hill.

The Red Spear are devastated and reduced to one base. 
 
The Re archers remove a base off the Black Spears.
 

The Chariots on both sides exchange arrows. But its a bottle neck with no room to manoeuvre.
The Canaanite Chariots are out numbered. But they have a plan!

The Green Chariots close with and pin the Ptah Chariots.
This means the Red Spears might be able to get onto Ptahs flank before the Khepesh arrive.

The Re Chariots have already taken a the equivalent of a base lose.
See the green wheel marker.

The Red Chariots have also taken 3 casualties.
See the sticks behind the unit with 4 are needed to remove a base.

The Black Spear are at half strength and should probably withdraw behind the hill.
But they are holding up two enemy regiments.

But the Re archers are too accurate today and the Black Spears flee.

The Red Chariots close with the Re Chariots and both have now lost the equivalent of two bases.
See the silver wheels. (I use two chariots but with each equalling two bases)
 
The Amun Chariots Skirmish with Green Javelins.

The Red Spear manage to flank the Ptah Chariots just before the Khepesh men arrive.
The effect is devastating for the Ptah, and they are reduced to one base.

The Re are also reduced to one Base. The advantage is now with the Canaanites.

The Khepesh arrive just in time to rescue what's left of the Ptah Chariots.
And cause the Red Spear to flee.

The Red Chariots have beaten the Re but are very weak.
 A Silver wheel means they are down to just two bases and three sticks means they are
 one casualty away from being just one base. 

The Khepesh join the Green V Ptah melee!

The Re foot archers move over to assist the Amun Chariots.

Back in the centre the Green Chariots have finally beaten the Egyptian Ptah Chariots
and are then routed by the Khepesh men!
Green Spears are now left to face both the Re Spears and the Khepesh alone.

A single base of Green Javelins and Amun Chariots in a lonely face off at the end.
The Canaanites withdraw.


Conclusion.

The simple Neil Thomas Scenarios continue to provide fun games. I'm also  enjoying his
 Ancient rules with only a minor adjustment to the moves and ranges to speed up play
and tweaking the armour rules.
The Egyptians
Should have deployed their Chariots on the left where they had manoeuvre room.
Instead they got trapped between the hill and the palm grove and got wasted in melees.
The Canaanites
A whole regiment of Spear failed to get involved because of indecision. They should have followed up the javelins as first planned but instead remained in reserve until it was too late.


Wednesday 13 May 2015

Whoa! Whoops and double whoops

Well I found a comments list on the home/design page. I thought what a great way to monitor the comments. I'll delete the old ones so the new ones are more obvious. It deleted every comment on my blog! Yesterday I spent hours doing a report. Then as I was writing the final sentence I touched a key that wiped out the whole post blank! Then instantly the @#$% auto saver stepped in and saved. So after hours of work all I had were the letters "ch" Ha ha ha. I was angry.

Tuesday 12 May 2015

The First Hittites

Completed some Hittite Chariots. 15mm Old Glory. I think they look a little Klingon. Could be the long dark hair and the metal studs!


Like the Egyptian Chariots when they arrived these packs presented a bit of a brain pain. Because like the Egyptians they included an archer and a spearman, in this case for a three man crew including driver. Hittite heavy chariots are supposed have two spearman no archer. After a couple of weeks uming and ahing I decided to combine the spear and make some chariots light archers, more chariots now needed! When I came to paint these I noticed there is only room for one fighting crew member any way! Problem solved. Some people believe that they only had one anyway so justified!
 

Sunday 3 May 2015

Counter Attack at Woody Knob. Kokonut #3

A relaunch of my Kokonut Island campaign using Neil Thomas' Scenario #10  "Late Arrivals" and for the first time "FiveCore Company command" rules by Ivan Sorensen.

The situation

The Saxonese Colonial forces are attempting to recapture the Village of Woody Knob a dominate feature in the Kokonut Highlands. They have managed to achieve some surprise and the NLA defenders only consist of a 90mm RCL and a section of infantry. All green troops.  The Saxonese Forces consist a Platoon of Infantry supported by a Light Mortar, Heavy Machine Gun and a AML60 armoured car. All Saxonese troops are green conscripts.
The 90mm RCL dug in next to the village.
 

The NLA infantry are located in the centre forest and
 the Saxonese are entering along the road to the right.
Two fire teams of NLA hidden from site in the woods.
 

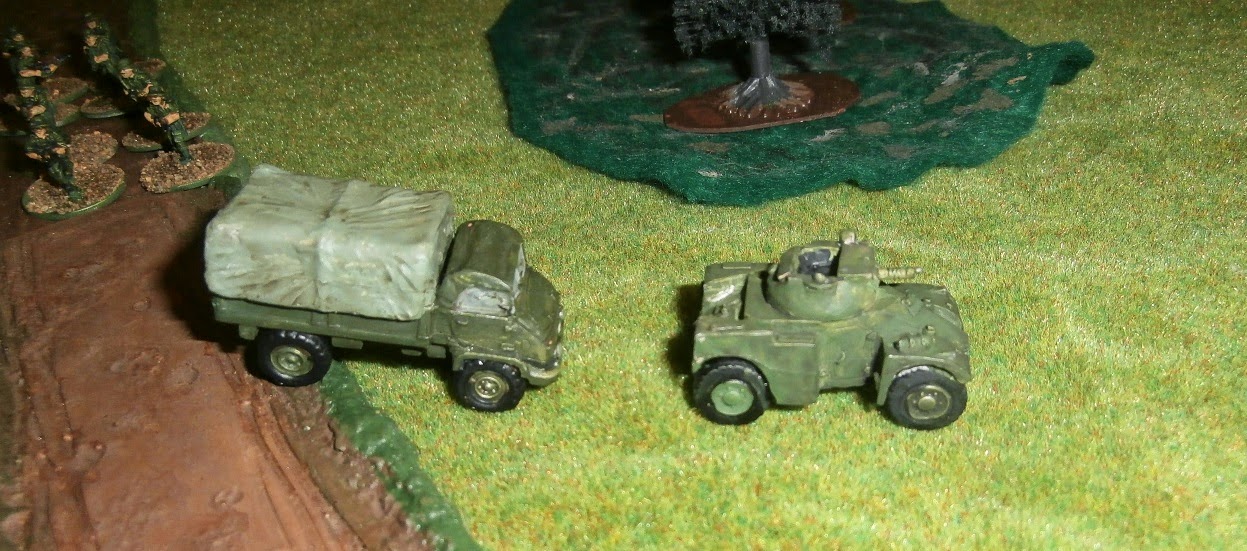
The AML Armoured car and accompanying truck of infantry
move down the road and head to the left flank.
The HMG sets up to cover the woods.
 
The AML60 and its infantry take position behind a hill on their centre left.
The NLA infantry move to the forest edge and open fire on the
advancing Saxonese. Both score hits with one Saxonese fire team losing heart
and abandoning the field!
The Saxonese Mortar has set up on the edge of a nearby wood.
They begin accurate fire down on the enemy infantry.
One fire team loses heart and retreats the other is pinned.
Meanwhile NLA reinforcements arrive in the form of two Technicals.
One armed with a 90mm RCL the other carries a machine gun.
The Technical manages to temporarily silences the HMG. 

The Technical and 90mm RCL manage to halt the advance on the centre woods.
 
Saxonese Infantry caught in the open are pinned and take casualties.
The infantry on the left debuss and advance over the hill towards the village.
The armoured car leads the advance and fires and the Technical.
And hits!
The 90mm places the Armoured car under accurate fire and supresses it.
The Saxonese finally manage to push the Rebels back into the forest.
Over confident from their victory over the Technical the Armoured Car
races around the swamp towards the enemy 90mm position.
The 90mm swings round and manages a direct hit on the Armoured car!

The Saxonese finally manage to supress the Technical that has been causing them so much trouble.

Lt Englevaat directs the HMGs fire.

The Technical is riddled and knocked out.
The fire fight in the woods heats up.

The infantry advance past the swamp.

Accurate fire supresses the 90mm.
 
Realising he was  winning when the Mortar was operating Lt Englevaat brings it forward.

More reinforcements arrive for the NLA.
 
The NLA use their fresh troops to counter attack on the right.
Picture shows troops moving past the burning Armoured Car.
 
The Saxonese turn back the counter attack.

Some NLA troops retreat into the houses. The 90mm turns back the troops advancing on them and suddenly the right flank is very quiet.

The Mortar also comes under accurate fire.
 

Lt Berthier Rallies the survivors in the house.
A NLA counter attack towards the centre forest is held with most teams marked as pinned.

With time running out the Saxonese attempt to advance down the left.

The NLA win in the centre and advance towards the forest.
It was now obvious that the attack had failed and the Saxonese withdrew.
 

Conclusions

Very enjoyable see saw game! The rules worked nicely, they are simple but also interesting. Same with Neil Thomas' scenario. Anyone familiar with either will notice things I've added. Tactically the Saxonese may have benefited from an all out attack down the centre before NLA reinforcements started to arrive.

The Campaign.

I have relaunched the campaign using the rules and ideas outlined in the book "Not Just a Brush War"
 
This has allowed a fully functioning financial system.
By holding Woody Knob the NLA now controls Kokonut Island's Timber industry
 an important trade good.